Blog Tagline

Blog Tagline
Showing posts with label yarn. Show all posts

6/23/15

Amigurumi Link


I spotted the free pattern for this amigurumi Link floating around the internet awhile back and immediately thought of my brother, who's love of Zelda reaches an almost disturbing level of intensity (he has branded himself with Triforce tattoo- a permanent tribute of devotion to Ocarina of Time).  Obviously an amigurumi Link was the perfect present for his 25th birthday, so I stored the pattern away in the catalog of my mind (and uh, on Pinterest), and looked forward to starting this project in May or so- plenty of time to leisurely stitch away with a completion date well in advance of his mid-June birthday. 

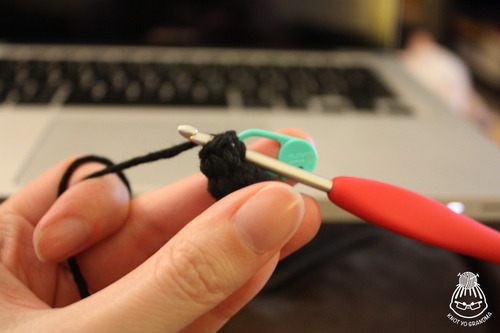
Fast forward to five days before Gifting Date, and I realized I had a problem when I hadn't really started yet.  I value precision over speed when it comes to crocheting--which is another way of saying that I'm slow.  I also have a job, which, you know, eats away at a lot of crochet time.  I am pleased to say I did finish before I saw him on his birthday, but my desk may or may not look like this:

*Note the chopstick sawdust
The original pattern for this Link is by the Japanese crochet artist Becchin, and I used the English version that was translated by Tanoshimou here (it's free!)  The pattern for the accessories, including the sword, sheath, and shield are by Stephanie at All About Ami and can be found here (also free!)

Some notes about the patterns:

1. Becchin's pattern calls for each row to be joined after completion.  I stopped joining after the torso and just crocheted the rest of the pieces in a spiral.  Joining resulted in a weird seam on the back of the torso, so I'd recommend eliminating it altogether. The finished result looks much smoother.
2. The accessories pattern calls for a size 2.0 mm crochet hook, but I used a 2.25 mm for the shield and scabbard and a 2.75 for the sheath.  I originally did the sheath using a 2.25 mm as well, but the result was too small to fit the chopstick sword (and was subsequently thrown across the room at 11pm the night before my brother's birthday).
3. I wanted my shield to be a little bit shorter and more compact, so I eliminated rows 9 and 10 in the shield pattern and skipped straight to row 11 after row 8.  The original pattern is more true to size since the real Link's shield is pretty tall, but I was going more for the spirit of the thing and didn't want the super tall shield to block the view of his body from the front.

Some fun facts about the finished product:

1. Link's boots, shield, sword, sheath and hat are removable (though if you take off his boots he has stumps instead of feet, which is sort of creepy).
2. Due to Becchin's ingenious construction, the head can be turned, posed and even removed (also creepy).
3. The sword is a the cut-off end of a chopstick.  Turns out its surprisingly difficult to cut up a chopstick with scissors, FYI.

Here he is from the side:


And from the back:


Here's a closeup of his shield, the design of which I embroidered with grey yarn and red and yellow embroidery floss:


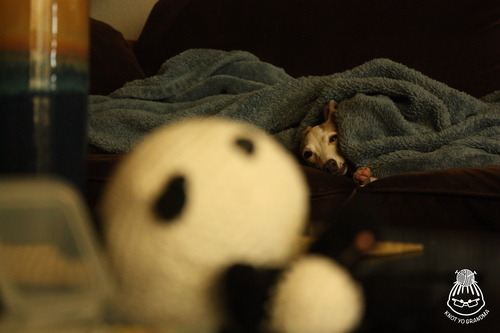
And here he is defending my house from its demon resident, Gareas:


I was really pleased with how Link turned out, and even more pleased with my brother's reaction.  It elicited a hug- yes, a hug- which doesn't sound like much, but is pretty astounding for two siblings  who prefer to keep their physical interactions limited to the violent/annoying variety.

Happy birthday, brother!  Have fun with your new friend.


2/3/15

Amigurumi Elephant


To keep my house from being overrun with crochet stuffed toys, I rarely keep any of the projects that I make.  There is already an army of lawn gnomes lurking in every corner of the apartment, and I suspect that were I to start adding amigurumi to the collection of creatures staring at him from atop the household surfaces, Michael would seek revenge by hanging his X Files "I Want To Believe" UFO poster in the living room (a monstrosity I cannot allow).  As such, when I found out that one of my dearest friends was going to be birthing offspring #2 this spring, I was super excited because 1. BABY! and 2. I really wanted a reason to make this amigurumi elephant, and here was the perfect recipient.

About two and a half years ago, I crocheted Offspring #1 (the brilliant and adorable Jacob) a blankie which I am proud to say has become his favorite:

Photo credit: Cameron Yelley

So I have a lot to live up to with the new arrival.

I  first saw this pattern when it was shared by Canadian crochet blogger Stephanie at All About Ami.  She translated the pattern into English (located here), but believes it was originally designed by Japanese crochet artist Chisachi Kushima, who is quite possibly a fiber genius. I have never encountered an amigurumi designed in this style- the entire thing (excepting the ears) is one piece, and it is brilliant.  I shudder to think of the amount of trial and error that went into designing this fellow given the very minimal amount of sewing and attaching involved.  One element that Stephanie added was the fabric lining to the ears- I loved the contrast the fabric provided both in color and texture to the crochet, so I picked up a random fat quarter on sale at Jo-Ann Fabric for 97 cents that I thought contrasted well with the Red Heart Super Saver "Pale Plum" I chose for the body.  I used an F hook.


As this was a gift for a baby and is likely to get manhandled and/or chewed sometime in the future, I was scared to leave the fabric's raw edges out in case they started to unravel after awhile.  I decided to glue the hem before sewing and used Aleene's "Ok To Wash-It" Permanent Fabric Glue (which turned out to be, uh, not permanent).  While the glue certainly wasn't enough to hold down the hem completely, it worked well enough to keep it semi-attached until I was able to sew the lining to the ears, which was really all I needed.
 

The "hemmed" edges before I sewed the fabric to the ear.


The process of sewing the lining to the crocheted ears was an ugly one- I am NOT a talented seamstress.  Stephanie's tutorial suggested using backstitches, and as I don't know any other stitches (including that one), who was I to argue?  I watched this video and then went for it, being sure to sew on the lining before closing up the crocheted ear so that I could hide the mess of thread and knots on the inside.  The results were shoddy at best, but I just warned my friend not to look at it too closely.  Hopefully the baby will forgive me someday.

The only part of the elephant I really changed from the pattern was the tail.  The pattern called for the creation of a crocheted tail, but I replaced it with a braided version because I have a thing for the tuft at the end.  There's nothing quite like a stubby, tufted tail on a big old animal butt.


Here he is from the side:


Go make one!  They are chubby and adorable.


12/31/14

Jolly Amigurumi Santa Poo


If you thought I'd get through the rest of 2014 without posting about another piece of crocheted crap, I am delighted to tell you that YOU WERE WRONG.  Obviously the best way to close out the year is with a holiday version of my favorite amigurumi!

Jolly Amigurumi Santa Poo is now the fourth rendition of the Jolly Amigurumi Poo (you can read about the original here and the European versions here).  I used the exact same pattern as the original, with the obvious difference being the addition of his wee Santa hat.  I figured I'd have a hard time finding a pattern for a perfectly-poo-sized hat, so I made one up.  If you need to crochet a Santa hat for a Jolly Poo or another small amigurumi (the hat is a little over 2.5 inches tall with the pom pom), here's my pattern:

Size F Crochet Hook (I used Red Heart worsted weight acrylic yarn)
In red:
6 SC in Magic Circle
R1: SC around (6)
R2: (Inc + 1 SC) x 3 (9)
R3: SC around (9)
R4: SC around (9)
R5: (Inc + 2 SC) x 4 (12)
R6: SC around (12)
R7: SC around (12)
R8: (Inc + 2 SC) x 4 (16)
R8: SC around (16)
R9: SC around (16)
Switch to white:
R10: (Inc + 1 SC) x 8 (24)
Slip stitch to close and fasten off, leaving a long tail for sewing.

I made the pom pom at the top of the hat using a fork and then just gave it an extreme haircut to make it really small.  Here's a good picture tutorial on fork pom poms (it also shows how to make monstrous pom poms using toilet paper rolls, if that's your thing.)  Make sure to leave a long tail on the pom pom when you tie it off so that you can use it to sew the pom pom to the tip of the hat's cone.

Once the hat is done, pin it to the Jolly Poo in a place you like, then sew it on.  In addition to looking festive on your coffee table or on your bathroom counter, Jolly Amigurumi Santa Poo also makes a cute, albeit ridiculous, ornament- just stick a hook into the tip of his poo head and hang him from your tree.  Make him now and stow him away with your ornaments as you take them down this week- that way you'll be pleasantly surprised (and/or disgusted) when you unpack your decorations for Christmas 2015.


Congratulations, you now possess the most festive feces in the land!

12/30/14

DIY Crocheted Reindeer Dog Headdress!


 My greyhound hates me this holiday season, because this:


I have seen different versions of these floating around on the internet for years, and I have always wanted to make one for Gareas.  Italian Greyhounds ARE reindeer. Unfortunately, that same weird little greyhound body that perfectly mimics a reindeer shape also comes with a tiny little greyhound pinhead. No traditional pattern has or will ever fit him.  I despairingly realized that if I were going to make this reindeer business a reality, I'd have to come up with a pattern myself.   

I didn't bother writing down the stitch counts for the neck and hood as it would be rather useless to anyone who isn't crocheting for a greyhound. I stitched along and just custom fit it to his body as he napped next to me on the couch, tongue lolling out of his head.  The neck was crocheted in rows of half double crochet stitches in the back loops only, which gives it that ribbed look.  I stitched in rows and kept going until it fit around his pencil neck- then matched up the ends and stitched them together using a whip stitch (as opposed to crocheting in the round).  When completed, the neck looks just like a cylinder.  The hood part that covers the top of his head was also custom fit- I attached a new piece of yarn into the top of the cylinder at the side of his face (while he was wearing it) and chained until I could attach the chain to the other side with enough room for his face to poke out.  Once the chain is attached to the cylinder at both ends, you have a sort-of circle if you look at all the chain stitches and the back half of the cylinder as one piece.  Starting where I attached the second half of the chain, I single crocheted around the circle in a spiral, gradually decreasing with each row (making sure to decrease evenly on each side) until I was able to close it.

I do recognize that the above (convoluted) method to create the hood and neckwarmer are probably impossible to understand for anyone but me- but it doesn't really matter!  The base is just something that's necessary to carry the important (and cute) part, which are the ears and the antlers.  You can really make any kind of base to go around your dog's head- I've seen this done with simple single crocheted headbands that tie under a dog's chin, which would probably be much easier to construct.  Thankfully for the cute part, I DID create patterns (and they're really easy!)

Antler Pattern (Make 2)
Size F Crochet Hook (I used Red Heart worsted weight yarn)
Notes: Antlers are crocheted as two separate pieces and then sewn together.  Each row is not joined- continue crocheting in a spiral and use a stitch marker to note the end of each row.

Piece #1:
SC 6 into Magic Circle (If you don't know how to Magic Circle- YouTube, my dear fellows)
R1: SC around (6)
R2: SC around (6)
R3: SC around (6)
...and keep going until your antlers reach a height you like.  I did 11 rows of 6 SCs.  Once you complete your last row, slip stitch to close and leave a long tail for sewing.

Piece #2:

SC 6 into Magic Circle
R1: SC around (6)
...keep going until until this piece is a little less than half the size of your first antler piece.  I did 5 rows.  Once you complete your last row, slip stitch to close and leave a long tail for sewing.

Sew the short piece to the side of the long piece using the yarn tail wherever you think it looks best.  I attached mine at rows 7 and 8 of the long piece.

Ears (Make 2)
Size F Crochet Hook (I used Red Heart worsted weight yarn- you will need two colors)

In Pink:
SC 6 into Magic Circle
R1: Increase x 6 (12)
R2: (Inc + 1 SC) rep x 6 (18)
R3: (Inc + 2 SC) rep x 6 (24)
R4: (Inc + 3 SC) rep x 6 (30)
Slip stitch to fasten off

In brown:
Repeat above instructions for pink, but do not fasten off.

Once both halves are completed, match the pink and brown pieces together with right sides facing out.  Hide any yarn tails between the two pieces.  Once the two halves are matched, SC through BOTH layers in each st around with the brown yarn.  Finish off and leave a long tail.  Pinch the bottom of the ear together and sew a few stitches using the tail to keep the bottom pinched.  This is the same method used to create the ears from my Amigurumi Hedgehog Pincushion- there is a picture in that post here that helps to illustrate how to put the ear pieces together.

Now sew the ears and antlers using those handy long tails you left to whatever base you made.  You've got yourself a reindeer instead of a dog!

If your pooch is anything like Gareas, he will respond to the improvements you've made to his appearance with immediate, wide-eyed alarm:


Happy holidays!

12/14/14

Crocheted Calm Cowl: Because Everyone in Southern California Needs More Extreme Winter Wear


One fine November day whilst gazing out the window of my office at the cloudless, bright, 80-degree day, I had the most obvious revelation- I clearly need a thick, exceedingly warm, cold-weather cowl or I could never make it through the harsh winter of Southern California.  I had been eying the "Calm Cowl" pattern by Suzana Davidovic on Ravelry for awhile, and RIGHT NOW was the time to make it- before temperatures began to dip into the 70s and the chill became unbearable.

This pattern (located for FREE here- you need a Ravelry account to view it), is extremely popular with over 2,000 completed projects.  I love using patterns that have been so widely tested on Ravelry- that means that any weird little errors have usually been worked out and corrected by the author, and sometimes other crocheters will provide alterations to the original that can really enhance the final project.  I looked through the notes of quite a few "Calm Cowl" makers and I decided to use the alteration to the first two rows suggested by Ravelry user OneFlewOver (project notes and alterations located here).  The alterations resulted in a pretty, delicate edging and I'm very happy with the results.  So happy in fact, that if I were to make another, I would add the same edging to the other side.


The entire thing is made using single and double crochet stitches, but instead of working stitches into the stitches of the previous row, the stitches are worked between the stitches of the previous row.  This results in a very solid look because the stitches are all so close together.  The project is worked in the round and the pattern calls for each row to be joined.  If I were to do it over, however, I would keep working in the round without joining because the seam looked a little wonky on so delicate a cowl.  If you do make this without joining rounds- please, for the love of all that's holy, remember to use a stitch marker. If you don't, you will certainly lose your place after about 3 rows and end up tossing the whole thing out a window.

One thing I particularly love about this cowl is that both the front AND the back of the stitches looks pretty, which definitely isn't always the case:


You can twist and wrap this thing to your heart's desire without having to worry about revealing an ugly side.

I desperately wanted to try out a luxury yarn on this project, particularly the lovely Madeline Tosh DK Merino that many Ravelry users chose. But at over $20 a skein, this cheapskate had to pass.  I substituted the (very cheap) Caron Simply Soft in white (it took a little over 1 full skein), which I already had in my hoard.  The texture came out quite nice, in my humble opinion.  One day I'll spring for the fancy stuff, but the Simply Soft resulted in a perfectly nice scarf that hopefully won't smother me to death when I insist on wearing it outside because IT'S WINTER AND I WANT TO WEAR A SCARF even if the sun is withering the plants on my patio with its relentless gaze.


11/3/14

Halloween Crochet: Amigurumi Candy Corn!


 After a rather long blogging (and crocheting!) hiatus, I have returned just in time for everybody’s favorite crochet season- autumn and Christmas.  This year I celebrated Halloween by trick or treating with one of my favorite 1-year-olds, so I knew I wanted to make her something cute for the occasion.  During one of my many Ravelry browsing sessions, I came across the free, squeal-inducingly cute Candy Corn pattern from Josephine Wu (you'll also recognize her as the designer of the Amigurumi Panda I blogged about).  The link requires you to log in to Ravelry to see the pattern.  Make an account if you don't already have one- it's free and the absolute best source for crochet and knitting patterns on the Interwebs.  But back to the candy corn- this wee fellow is the perfect size to fit in a toddler palm and I already had the right yarn colors in my hoard, so crochet him I did.

I used Red Heart worsted weight acrylic yarn, which, despite being on the scratchy side for projects like blankies and scarves, is perfect for amigurumi (with the added bonus of being cheap and available everywhere).  The stiffness of the acrylic yarn helps the amigurumi carcasses to hold their shape before they are stuffed, and the yarn plies (plyes? Is this a word?) are pretty good about not splitting even with the little size F crochet hook this project calls for.  A lot of crocheters prefer 100% cotton yarn for amigurumi projects since it tends to fuzz less, but that stuff kills my fingers and I actually prefer the slightly fuzzy finished look of acrylic.


Isn't he cute?  My friends' daughter Emma seemed to like him well enough, so I am satisfied.  We had a grand time taking our kids trick or treating around our local neighborhood (and by "our" kid I am referring to Gareas.  He was a slightly unhappy blue crayon).  I was unfortunately reminded of how much I despise middle school-aged children as they ran amok in the streets without their parents to keep them from acting a fool, but alas, these situations cannot always be avoided.


Now that Halloween is out of the way, I am looking forward to tackling an (over)ambitious amount of crochet projects for winter and Christmas.  Expect to see more posts than you have been lately!

6/14/14

America! The Jolly Amigurumi Poos Return.

The Jolly Poos have returned from their respective homelands, and we have returned from our European adventure.  Our luggage has vomited on my living room and I can’t stop waking up at 3am to eat, but we did a lot of memorable things that are totally worth a bit of jet lag.  The short list of tourist traps (but beautiful tourist traps!) we visited during our two-week trip included the Eiffel Tower (could it really be avoided on a first trip to Paree?  At least we didn’t wait in line to climb the thing), the Champs-Elysees, the Arc de Triomphe, the Sacre-Coeur Basilica, Notre Dame, Chartres, the Louvre, the Orsay Museum, the Rodin Museum, the Tuileries Gardens, Versailles, Chartres, the British Museum, the Tower of London, Platform 9 3/4 at King’s Cross, Buckingham Palace, the Tate Modern museum, Westminster Abbey (just the outside—20 pounds to wait in line for an hour to go inside that thing on the last day of the trip? I think not), and the crowning vacation jewel—the Warner Brothers Harry Potter studio tour in Leavesden.  We ate french pastries and macarons for dinner, avoided gypsies on the Paris metro, and rode on a double decker bus (don’t sit on the top level if you get carsick).   I enjoyed London and Paris quite a lot and I am grateful for the opportunity to have experienced two new cities—but my God do I love ice cubes, excessively wide roads, toilet seat covers in public bathrooms, and the good old soul-crushing boredom of the American suburb.  It’s nice to be home.

The EuroPoos don't agree--don't they look like they had fun?

Sir Poo hangs out in front of the Louvre
Monsieur Poo becomes automatically cultured by posing in close proximity to the Musee de Louvre.


Sir Poo at the British Museum
Sir Poo enjoys the British Museum.


Monsieur Poo at Versailles.
Monsieur Poo sunbathes in the Versailles gardens.


If you missed the live updates of the EuroPoo adventures while we were gone, fear not! You can catch up on the @KnotYoGrandma Instagram (who WOULDN'T want to miss two mustached pieces of crap posing in front of famous European monuments? Certainly not I). 

We had fun, too.  Paris really is beautiful, and the Warner Brothers Harry Potter Studio Tour really is superb.  London is...like the US.  Except old.  And people advise you to "fag it in the bin" instead of "throw it in the trash."

Michael takes a stroll through Marie Antoinette's domain.

Arc de Triomphe
Underneath the Arc de Triomph.

Eiffel Tower
It rained every day we were there...in May.

Hogwarts!
Hogwarts!
The Hogwarts Bridge!  Or at least what was left after Neville blew it up.

I am definitely excited for our next trip so that I can crochet some more European poo representatives (Señor Poo, anyone?)

5/15/14

Jolly Amigurumi Poo Goes Abroad!

Remember my Jolly Amigurumi Poo from this post?  He’d like me to introduce his European cousins, Monsieur Poo of Paris and Sir Poo of London!

image

In honor of our upcoming trip to England and France, I thought it would be fitting to branch out in the area of poo-related crochet and craft these charming fellows to accompany us. I used the same pattern as the original Jolly Amigurumi Poo and then had some fun accessorizing.  Monsieur Poo’s striped shirt was made by alternating rows of white and black worsted weight yarn from row 22 to the end of the pattern.  This gave me a chance to practice the tapestry method of crochet, where you carry along whatever color you’re not using and crochet your stitches right over it.  So much easier than weaving in a gajillion ends like you would with normal color changes!

I was not able to find a pattern for a tiny beret, so I made one up (scroll to the end of this post if you’d like to try it.  You know, in case you ever need to crochet a beret for a rodent).  Sir Poo’s top hat was crocheted using this pattern and then I hot glue-gunned the red ribbon around the brim.  His monocle was embroidered using black embroidery floss.  Both of their mustaches were cut out of black felt and were then glued to their poopy little faces.

Aren’t the EuroPoos dapper little fellows?

image


image

Miniscule Beret Pattern

SC 6 sts into a Magic Circle
R1: Inc in each st (12)
R2: *Inc, SC* rep x 6 (18)
R3: *Inc, 2 SC* rep x 6 (24)
R4: (Back loops only) *Dec, 2 SC* rep x 6 (18)
Finish off and leave a long enough tail to weave in and then poke the rest through the middle of the magic circle to create the beret’s little antenna.


These Jolly Poos are off to pose with some famous monuments.  Stay tuned for the post-trip photo post and make sure to follow the Jolly EuroPoo adventures on the brand new Knotyograndma Instagram

4/19/14

Amigurumi Hedgehog Pincushion

Introducing my newest amigurumi critter design: Hedgehog Pincushion!


Now Michael can stop giving me those alarmed looks whenever I leave my pins in the arm of the couch.


Pattern and tutorial post coming soon!

4/8/14

Bernat Pipsqueak Yarn: Soft, Duplicitous Balls of Evil

Let’s talk for a second about how Bernat Pipsqueak yarn was clearly conceived by Satan.


image


I saw it at Michael’s and couldn’t resist.  So snuggly! So magically soft! So perfect for my next amigurumi project!


Alas. 


The minor downside?  Once you make your stitches YOU WILL NEVER SEE THEM AGAIN.


image


How many single crochets are in the above amigurumi carcass?  Your guess is as good as mine.  It’s impossible to see any stitches once you make them and, even worse, its impossible to tell what hole you’re crocheting into.  If you’re going to use this yarn you had better be really great at counting without starting over because you will definitely never find your place again.  Also hope that you don’t let your hook slip out of the loop, because it will take you at least 13 minutes to get it back where it’s supposed to be.


Also- it sheds.  A lot.  I hope you like the couch/chair/throne you crochet in, because you’ll be picking bits of Pipsqueak yarn out of it for at least 3 months.


Despite my hatred of this beastly substance, I haven’t scrapped my project. IT’S JUST TOO SOFT.  New amigurumi creature & pattern to come!


Ah Bernat Pipsqueak- Once a magical ball of promise, now a duplicitous pile of sheddings in my dust buster.


PS. There IS one being who likes it.  I guess it’s too much to ask a bald Italian Greyhound not to snuggle a pile of yarn that feels like an effing cloud.


image


4/5/14

Jolly Amigurumi Poo Pattern

What’s that? You’ve always wanted to crochet your very own smiling piece of crap?  WELL NOW YOU CAN. 


image


I found myself needing an amigurumi poop, but there is a mysterious (or not) lack of cute poop patterns floating around the internet.  Thus, my original pattern for Jolly Poo was born.  I share it with you now so that the internet can finally become a reliable source for feces-related crochet.


Materials
Acrylic worsted weight yarn (in any of varying shades of brown depending on your digestive regularity and/or diet)
Size F crochet hook
2 9mm safety eyes
Black embroidery thread
Yarn needle
Embroidery needle
Poly-Fil stuffing (or equivalent)


Things to Know


This is an original pattern by Robyn of Knot Yo Grandma. It has been provided at no charge and cannot be sold or redistributed. Please do not claim this pattern as your own. When referencing this pattern, please link back to this post.

This pattern is worked entirely in the round with single crochet stitches using increases and decreases.   Do not join rounds—continue working in a spiral.  Use a stitch marker to mark the last stitch of each row.


CH= Chain
SC= US Single Crochet (UK Double Crochet)
Inc=Increase (2 stitches in 1 stitch)
Dec=Decrease
st= Stitch(es)
rep= Repeat instructions within *stars*


Pattern


R1: 6 SC into Magic Circle OR CH 2 and stitch 6 SC in 2nd CH from hook
R2-3: 1 SC in each st around (6)
R4: Inc in each SC (12)
R5-6: 1 SC in each st around (12)
R7: *Inc in next SC,  SC in next st* rep x6 (18)
R8: SC in each st around (18)
R9: *Inc in next SC, SC in next 2 st* rep x6 (24)
R10: *Inc in next SC, SC in next 3 st* rep x6 (30)
R11: *Inc in next SC, SC in next 4 st* rep x6 (36)
R12: 1 SC in each st around (36)
R13: *Dec, SC in next 4 st* rep x6 (30)
R14: 1 SC in each st around (30)
R15: *Inc in next SC, SC in next 4 st* rep x6 (36)
R16: *Inc in next SC, SC in next 5 st* rep x6 (42)
R17: *Inc in next SC, SC in next 6 st* rep x6 (48)
R18: *Inc in next SC, SC in next 7 st* rep x6 (54)
R19-21: SC in each st around (54)
R22: *Dec, SC in next 7 st* rep x6 (48)
R23: *Dec, SC in next 6 st* rep x6 (42)
R24: *Dec, SC in next 5 st* rep x6 (36)
R25: *Dec, SC in next 4 st* rep x6 (30)
R26: *Dec, SC in next 3 st* rep x6 (24)
Place safety eyes and clip backings into place.  Start stuffing.
R27: *Dec, SC in next 2 st* rep x6 (18)
R28: *Dec, SC in next st* rep x6 (12)
R29: Dec x 6 (6)


If there is still a small hole, sew it shut.  Fasten off and hide the yarn end in the poop. Embroider the mouth.


Now you have a happy little lump of waste to keep you company.  I’ve noticed that a lot of amigurumi patterns have instructions that say “embroider the nose” or “stitch on the mouth,” but the explanation pretty much ends there.  If you’re new to amigurumi-making and aren’t sure exactly what embroidery entails, here’s a great video tutorial.


If anybody uses the pattern, (doubtful, as the end result is stuffed feces…) do share!  If you mention the pattern anywhere (also doubtful), please remember to link back to my original post. 


image


Jolly Poo bids you adieu.

4/2/14

Amigurumi Panda: Fat Heads & First Posts

First thing’s first: Herro premier blog post!


And now, on to more important items.


Michael has been after me for quite a while to crochet someone to keep him company on his desk at work, but with the influx of new friend/family offspring born in 2013 (a very fertile year), I really haven’t had time.  I finally got a break from the baby showers, so I trolled the internet for the perfect cubicle companion and found the pattern for Baby Panda & Lucky Bamboo by Josephine Wu of amorningcupofjo


As soon as I saw it I knew this was The One.  In fact, this fellow is so cute that I deemed him worthy of my very first Knot Yo Grandma blog post.  Not only did this pattern have a giant-headed panda with a tiny adorable panda tail for its tiny adorable panda butt, but it also came with a pattern for the panda’s very own dinner/bamboo!  Bamboo plants are very lucky in Asian cultures, and Michael had actually been wanting one for the office anyway.  I was pleased to provide him with one that is unkillable.


The pattern was impressively detailed and contained a lot of photos.  You can find it here.


Like all amigurumi, Fat-Headed Panda was crocheted in the round with super tight single crochets.  Tight stitches were particularly important for this project because of the black yarn- white stuffing poking through black yarn is, simply put, fugly.  Black yarn in general actually just sucks, I just haven’t worked with it much before so I never realized.  Look at the below photo- can you count those black stitches?  Yeah, neither could I.


image


image


I went with the pattern’s recommended Lily Sugar’n Cream cotton worsted weight yarn (except for the grey- that was Hobby Lobby I Love This Cotton).   I’m used to working with acrylic yarn, so this rough cotton stuff really hurt my fingers.  However, it does come in some really great, bright colors and it’s relatively inexpensive, so I wouldn’t rule out using it again after my finger wounds scab over.


image


I was disproportionately excited to complete the cabesa and was tempted to give Michael a lone, fat panda head instead of the whole critter.  I refrained.


image


Pinning and sewing this fellow together was actually kind of difficult- his body and limbs are tiny! Most of the amigurumi I’ve made in the past have been pretty big, at least 8” or taller.  You might notice someone lurking in the blurred background of the above photo. 


He is basically only good for napping, whining, and staring.


image


My excitement after finishing the panda head was nothing compared to my excitement after finishing the bamboo.  There MAY have been some cheating going on- the pattern called for 13 or so little rocks to fill up the entire planter.  I finished about 7 before I had an eff-this moment and filled the vase up with grey scrap yarn instead.  I put the 7 rocks on top and VOILA you cannot tell I didn’t spend 2 hours hand making a vaseful of rocks.


image


Aren’t they the perfect cubicle mates?


image